Clay and Sculpture - 2014

Cut Paper Project #1
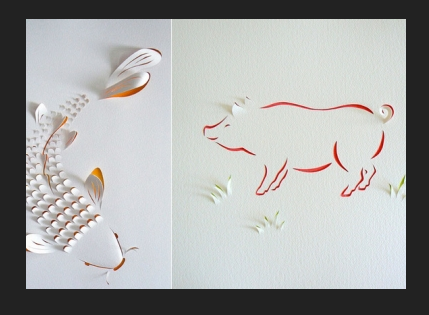
•In this lesson we will take a “low relief” approach to paper sculpting.
•Low Relief- a carving/or cut that projects very little from the surface.
•We will be using precise cutting techniques and repetition to create subtle and delicate paper sculptures that hang from the wall.
-The resulting piece will look almost like an extended draping snow flake.


Step 1: Design
Brainstorm several motifs- (personal symbols, initials, abstract, etc.) Educating Hearts & Minds?
•With a pencil and the aid of the ruler and or architectural template, draw the examples shown in the slideshow or use the handout provided.
•The dashed lines are where the paper should be folded; the solid lines are where the paper should be cut. The designs should be centered within the squares.
• Using an X-acto knife, carefully cut the designs as shown in the diagrams. Do this on the practice paper first.
• Fold over the dotted lines carefully, forming the required creases.
• Fold each tab to produce the relief effect.
• Now, experiment with your own creative ideas using the preliminary designs as a springboard for your own ideas. Think of personal symbols. Could you come up with a symbol for this year's theme, Educating Hearts and Minds?
• After deciding on at least two ideas, continue on to the next stage.
Step 2: Execution
•1. Using a T-square, measure and mark 1-1/2" in from the outside edges of the long sides of the 15" by 22" drawing paper. Now measure 2" in from each of the short ends. Use a pencil to connect these marks and create a border. The area within this bordered area should measure 12" by 18".
•2. Grid the inner area to create (horizontally) 12 -1" by 1" squares and (vertically) 18 - 1" by 1" squares.
•3. Use the template, ruler and a pencil, to duplicate your own designs, alternating your designs square to square.
•4. Carefully cut out your designs with the X-acto blade knife.
•5. Turn over the paper and fold and crease where needed. Flipping over the paper to the back side eliminates the need to erase the pencil marks on the front of the paper.

Project Due Dates:
Idea & Sketch Due: Wed. 8/20
Final project Due: Monday, 9/8.
*Confirm due dates with teacher.
Grading Rubric
-
Directions & Techniques (10pts)
The student followed all the project directions and requirements (grid motifs, alternating pastern, pop-up sections that are raised from the paper), used all appropriate techniques (clean edges, etc..)
2. Composition & Creativity (10pts)
Final piece is highly developed and shows intention. The student sketched different ideas and translated them to the final piece.
3. Craftsmanship (10pts)
High level of craftsmanship; everything was completed neat and clean, no extra marks, or super obvious pencil seen.
4. Effort & Participation (10pts)
Student worked everyday for the bulk of the period without reminder; cleaned up adequately and at the appropriate time each day; took responsibility for their project, work area, and respected the projects and work of others.
Artists! - Paper Sculpture
Lisa Rodden: http://www.lisarodden.com/p788801834


